
Digitalization
19. September 2022
Guide: How to add ‘review schema’
This post is part of a “mini-series” of guides on how to add structured data to your website.

You add ‘review’ schema to your website by doing the following:
- Download the template you will find in this post
- Leave everything written in SMALL as it is
- Everything in RED must be edited to match your information
- Select all text and copy it
- Insert the information between the tags on your website
- Well done – that’s it
This post is part of a “mini-series” of guides on how to add structured data to your website.
We will cover the following schema.org types:
- Local business
- Review (this post)
- FAQ
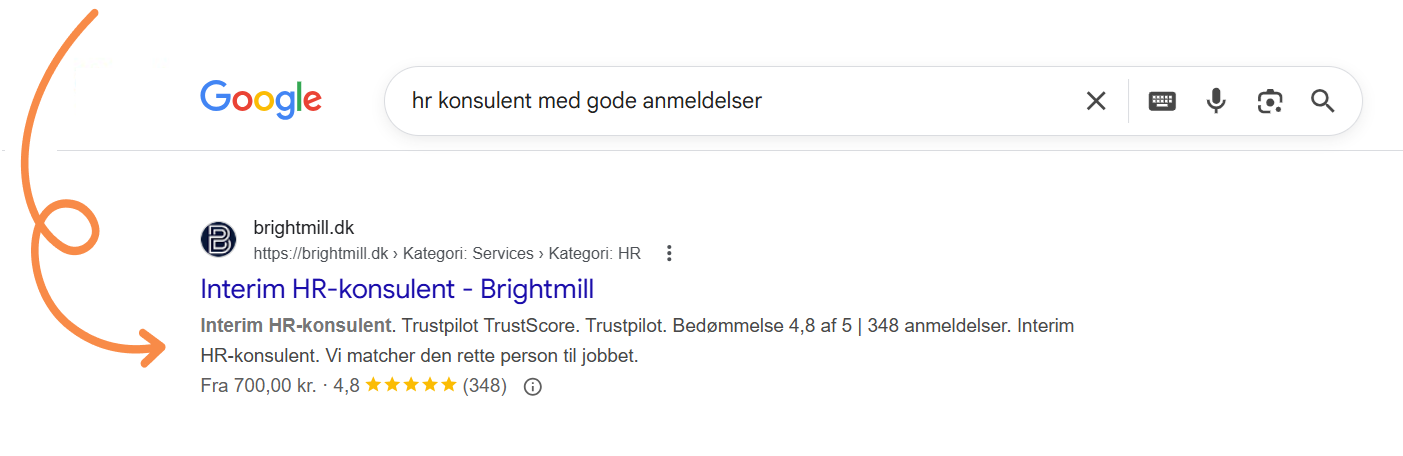
In this guide, we will focus on reviews. It is beneficial to have online reviews in search results, as they help improve your credibility, increase your conversion rate, and reduce the time customers spend researching your product or service.
When you add star ratings to Google’s search results, you will be able to display your hard-earned reviews immediately.
The two methods for adding star ratings
- You can either add a review of your business to your ‘Local Business Schema’, which we covered in the previous guide.
- Or you can add a review of a product that your business sells.
Before we begin, it is important to note that Google operates in its own world, and WE cannot guarantee that Google will display your SERP enhancement, but we can say that if you have implemented both “star ratings” and FAQ (which we cover in the next guide), Google will only show one of the two. In most cases, it will be your “star ratings” that are displayed.
In this guide, you will learn how to add reviews to your products, which has the best chance of being displayed.
Here is what you need to have ready:
- Our template (opens in a Word document)
- The product reviews
Product information (company logo, product images, and product description)
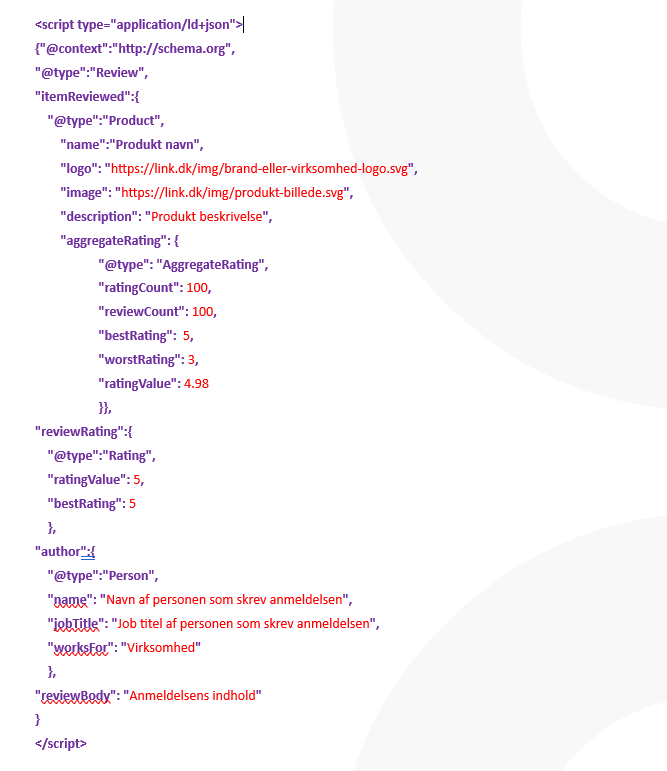
*the template you downloaded should look as shown above
If it looks correct, the following applies:
- Everything you see in PURPLE must remain exactly as it is. Note: it is important that you do not delete commas, quotation marks, or anything else written in PURPLE.
- Everything written in RED must be edited to match the information from YOUR business.
- When filling out the template, you must not press ENTER at any point, as it changes the code and it will no longer work.
So far, so good. Now I recommend that you double-check the information you have entered.
Once you have entered and checked your information, proceed to this step
- Select all and copy
- Insert the information between tags on your website. Note: if you only insert it on one page, we recommend doing it on the homepage.
Well done! You are now officially on your way to becoming more visible on Google.
If you use WordPress and would rather use a plugin to add your script to the header, see the example below.
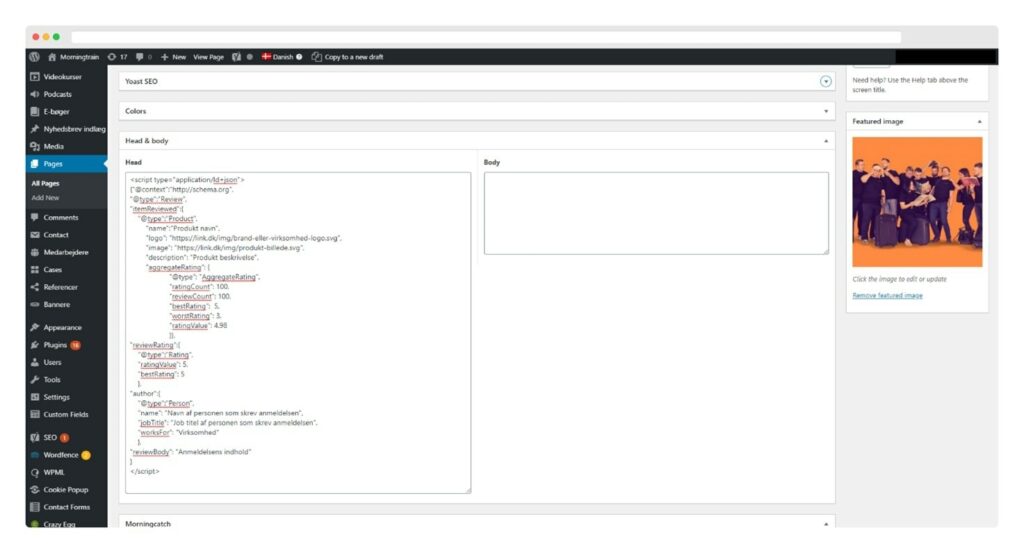
Here is an example where we use a custom solution on our own website, built by our developers, but you can also download a free plugin such as Head & Footer Code or any other plugin that allows you to add scripts to your site header.
If you need a more detailed explanation of how to add structured data to your website, you can read this blog post.
After you have filled out the template and added it to the site header, go to: https://search.google.com/test/rich-results
Copy the link to your website or the page where you added the script, paste it into the search field, and click the “test url” button.
If you have set everything up correctly, your screen should look like the image above, with two green check marks in your Review snippet section.
You now have both your ‘average’ star rating AND the one from the individual review shown in your code.
It is now up to Google to decide which one to display. Normally, it will be the individual review.
And hey! That went really well. Now you are ready to get started with FAQ schema.
If you did not manage it, you can also take a look at local business schema.