
Digitalization
19. September 2022
Guide: How to add ‘local business schema’
This post is part of a “mini-series” of guides we have created on how to add structured data to your website.

You add ‘local business’ schema to your website by doing the following:
- Download the template you will find in this post
- Leave everything in PURPLE exactly as it is
- Everything in RED must be edited to match your information
- Select all text and copy it
- Insert the information between the tags on your website
- Well done – that’s it
This post is part of a “mini-series” of guides we have created on how to add structured data to your website.
We will cover the following schema.org types:
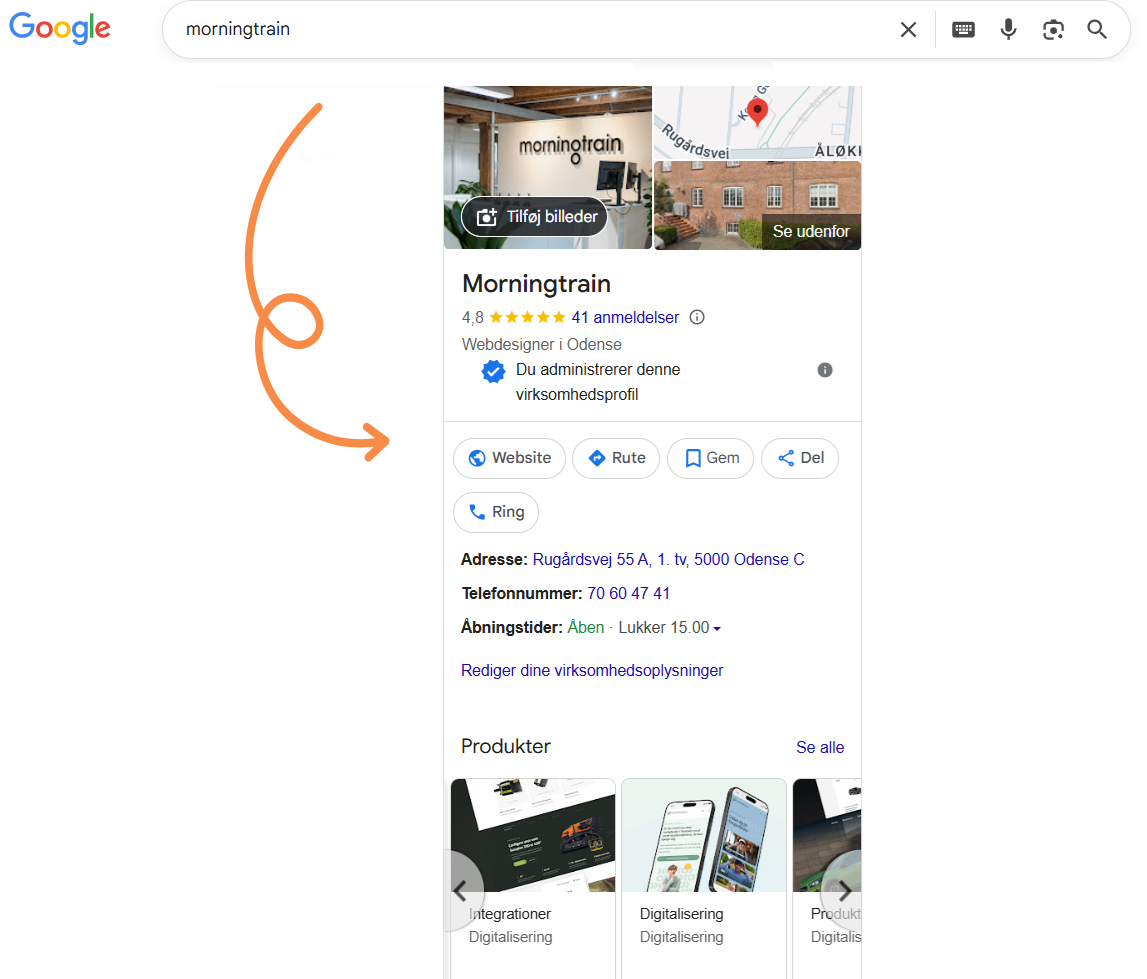
In this guide, we will focus on local business, which helps Google read your website information correctly i.e., company name, contact email, phone number, opening hours, etc. When you fill in this information, it also creates an important synergy with Google My Business, which helps ensure that the information Google shows in its search results remains correct.
When you fill in your information, it is important that it is exactly the same as what you have written on your website and in your Google My Business.
Now for the more technical part and the start of the guide. So if you need to top up your coffee or stretch your legs, now is the time.
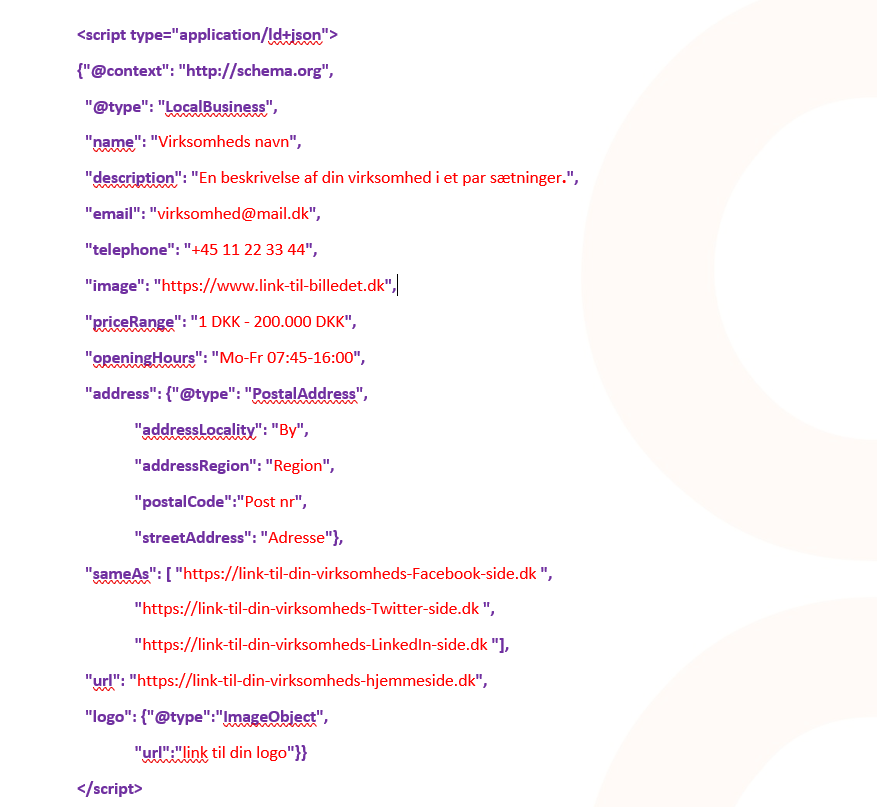
- Download this template (opens in a Word document)
- Everything you see in PURPLE must remain exactly as it is. Note: it is important that you do not delete any commas, quotation marks, or anything else written in PURPLE.
- Everything written in RED must be edited to match the details of YOUR company.
- When filling in the template, you must not press ENTER at any time, as it changes the code and it will no longer work.
So far, so good. If you are even a little like me, you have already double-checked the information you entered if not, I recommend that you do so now.
Once you have entered and checked your information in the template, you must now:
- Select all and copy
- Insert the information between tags on your website. Note: if you only insert it on one page, we recommend doing it on the homepage.
Well done! You are now officially on your way to becoming more visible on Google.
Do you use WordPress and would you rather use a plugin to add your script to the header? See the example below.
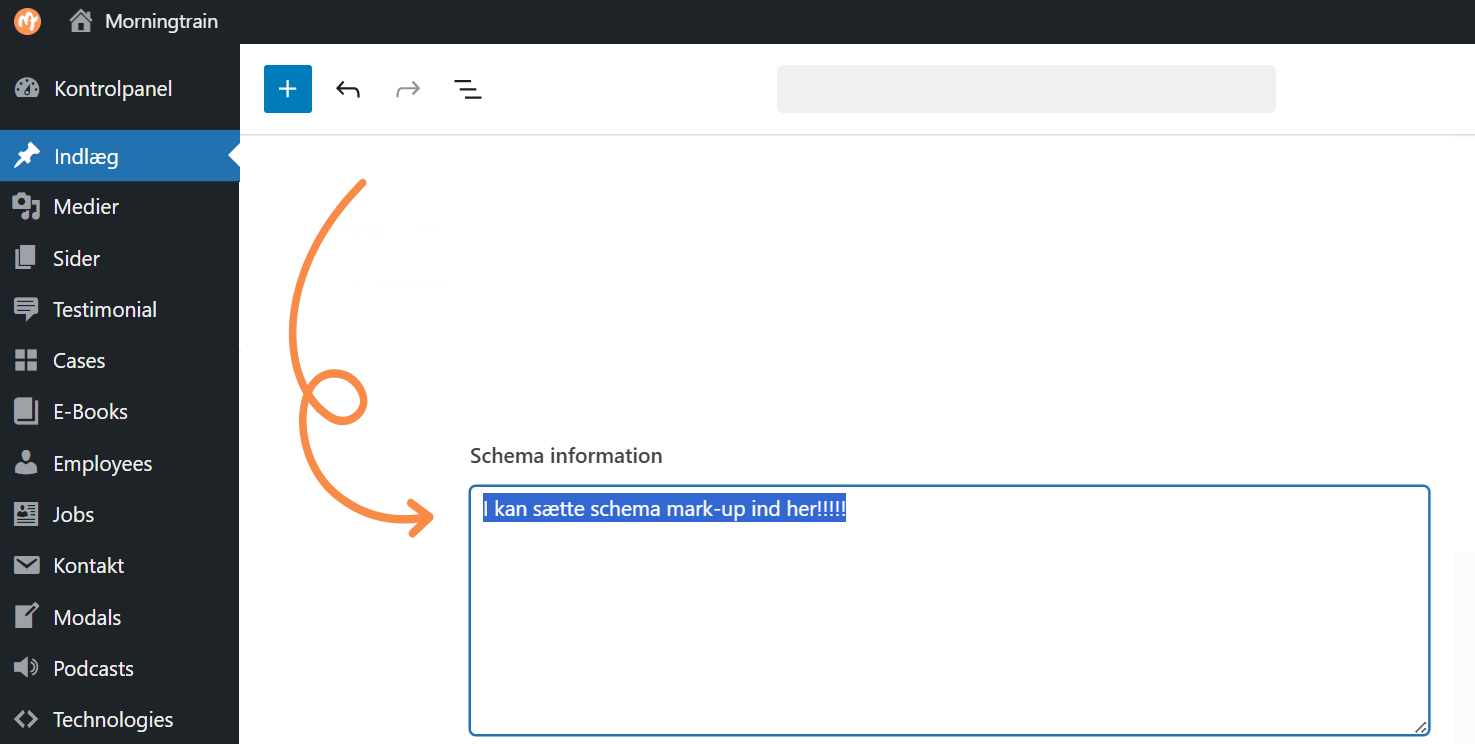
Here is an example where we use a custom solution on our own website, built by our developers, but you can also download a free plugin such as Head & Footer Code or any other plugin that lets you add scripts to your site header.
If you need a more detailed explanation of how to add structured data to your website, you can read this blog post.
After you have filled in the template and added it to the site header, go to: https://search.google.com/test/rich-results

Copy the link to your website or the page where you added the script, paste it into the search field, and click the “test url” button.
We hope our guide was easy to follow and that you are ready for the next one, where we look at ‘Review Schema’, which adds stars to your SERP.
You can also jump ahead to FAQ schema.